How to Build a Foundation for an Outdoor Sauna
Foundation for an Outdoor Sauna
There are many ways to do a foundation for an outdoor sauna. The correct one should be selected based on the soil load-bearing properties, materials available, complexity, frost depth in your area, and the building weight. The foundation should always sit on undisturbed soil. This is because soil settles over time, and freshly dug-up soil is not able to support the same weight as settled soil. Usually, a period of 5 years is needed for the soil to settle.
If you have a slope, excavating the soil and filling it in after the foundation has been built is better. Frost depth is the depth at which the ground can potentially freeze. This depth is different in every location. Check the IBC (International Building Code) in the US or a building code in your country.The IBC has an exception to the frost protection rule: “A freestanding building with an area of 600 sq ft (56 m²) or less for light-frame construction, with an eave height of 10 feet (3048 mm) or less and assigned to Risk Category I (temporary buildings or those with few occupants).” Long story short, most saunas fall under this definition, so don’t stress the frost depth too much.
Sauna Foundation Types
Pier Foundation
A pier is a vertical column made from concrete. This is done by digging a round hole and placing a cardboard tube that will be later filled with concrete. It is probably the most common type of foundation for small structures. It is relatively easy to build but requires high accuracy. I usually specify this type of foundation in sauna projects.
Pier and Pad Foundation
This is just like the Pier foundation, but there is an additional concrete pad underneath each pier. The pad is usually three times wider than the thickness of the pier. This type of foundation is good for heavier structures.
Pad Foundation
A basic, easy-to-build type of foundation. It consists of a flat piece of compacted ground, and concrete is usually poured to make a stable base. Reinforcing the concrete with steel is a good idea, as it will give it extra strength.
Ground Screw Foundation
A less common type of foundation that uses round steel tubes screwed into the ground. It is one of the fastest ways to do foundations, but it requires a special driver with proper torque to drive the ground screw into the ground. This is a good option for sloped ground.
Concrete Block Foundation
One of the most basic types of foundation. This foundation is constructed by placing concrete blocks on a bed of compacted gravel, ensuring they are perfectly leveled. The timber floor joists rest on the concrete blocks. Timber and concrete need to be separated by a waterproofing layer, because concrete will soak up water from damp soil, and over time it will cause the timber to rot. You can use an EPDM or asphalt-based membrane.
DIY Sauna Foundation
Tools Needed:
- Spirit level
- Marking out a rope
- Spade
- Mechanical ground compactor (optional)
- Digger (optional)
Materials:
- Crushed gravel, enough to fill 8 holes 18” deep (45 cm)
- 8 concrete blocks
- Adjustable post base (optional)
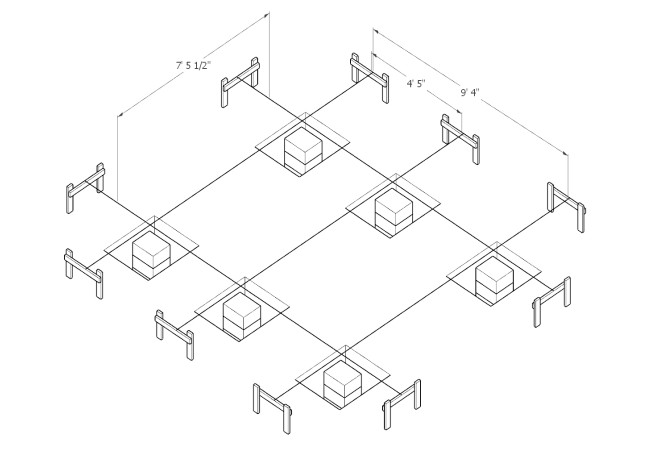
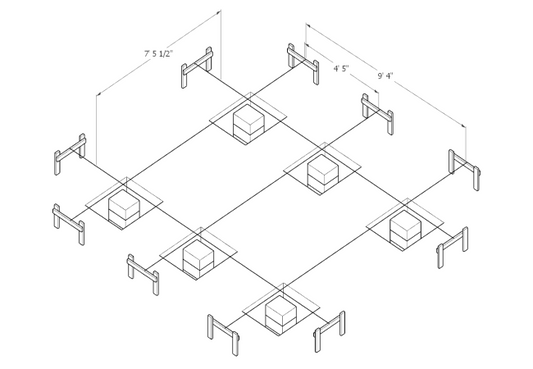
Mark out the exact location of your sauna with a thin rope. Pick one of the foundation types that is the most suitable to your own situation. If in doubt, speak to a local builder. We will use a concrete block on a crushed gravel foundation for this guide. It is suitable for most ground conditions. It will result in the sauna’s first floor being elevated from the ground by about 18” (45 cm), so make sure you are okay with it. If you have sloping ground, the floor might be even higher, and you might need to build a few stairs.
Dig 8 holes, about 18” deep (45 cm), in the marked-out locations. Fill the holes with crushed gravel and compact it. You can use a motorized petrol or electric compactor or a manual compactor. Place large concrete blocks in the 8 locations. The bigger, the better, but make sure you can move them—concrete is heavy. Make sure the top of the blocks are perfectly level with each other. If you have a sloping site, you can get an even level by adding more concrete blocks. Fine adjustments can be made by adding or subtracting crushed gravel or using an adjustable post base with a “U” type of attachment.
After the services and the foundation are done, cover the ground with 2” (5 cm) of sand to level the ground. Next, lay down a geotextile membrane (a fabric sheet used in construction and civil engineering to improve soil stability and drainage) that will stop any plants from growing. You can use steel pegs to secure the membrane. Cover the membrane with another 2” (5 cm) of clean gravel. This will hold the membrane down securely and give you a nice-looking surface under your sauna.

If you liked this article, you’ll love our e-book! This guide is taken straight from it, and the e-book is full of tips and step-by-step instructions to help you build your dream sauna. Check it out and get started today! Click here to read more.
Happy Building,
Wojciech


