Building an Outdoor Sauna Foundation: A Step-by-Step Guide
If you're a sauna enthusiast like us, you know that nothing beats the feeling of stepping into a warm, cozy sauna after a long day. Whether you're looking to unwind, destress, or just take some time for yourself, there's nothing quite like the relaxation and rejuvenation that a good sauna session can provide.
But if you're thinking about building your own outdoor sauna, the first step is to make sure you have a solid foundation in place. After all, a well-built foundation is essential for ensuring that your sauna is safe, sturdy, and long-lasting.
Here are some tips and tricks to help you build the perfect outdoor sauna foundation:
1. Choose the right location
Before you start digging, make sure you choose the right location for your outdoor sauna. Ideally, you want a spot that's level, well-drained, and free from any nearby trees or other potential hazards. You should also consider factors like privacy, accessibility, and sun exposure, depending on your preferences.

2. Dig the foundation holes
3. Use high-quality prefab foundations
To save time and ensure a sturdy foundation, we recommend using high-quality prefab foundations, like those from BETOSYSTEM. These prefabricated concrete elements are designed to support the weight of your sauna and provide a solid, level base.

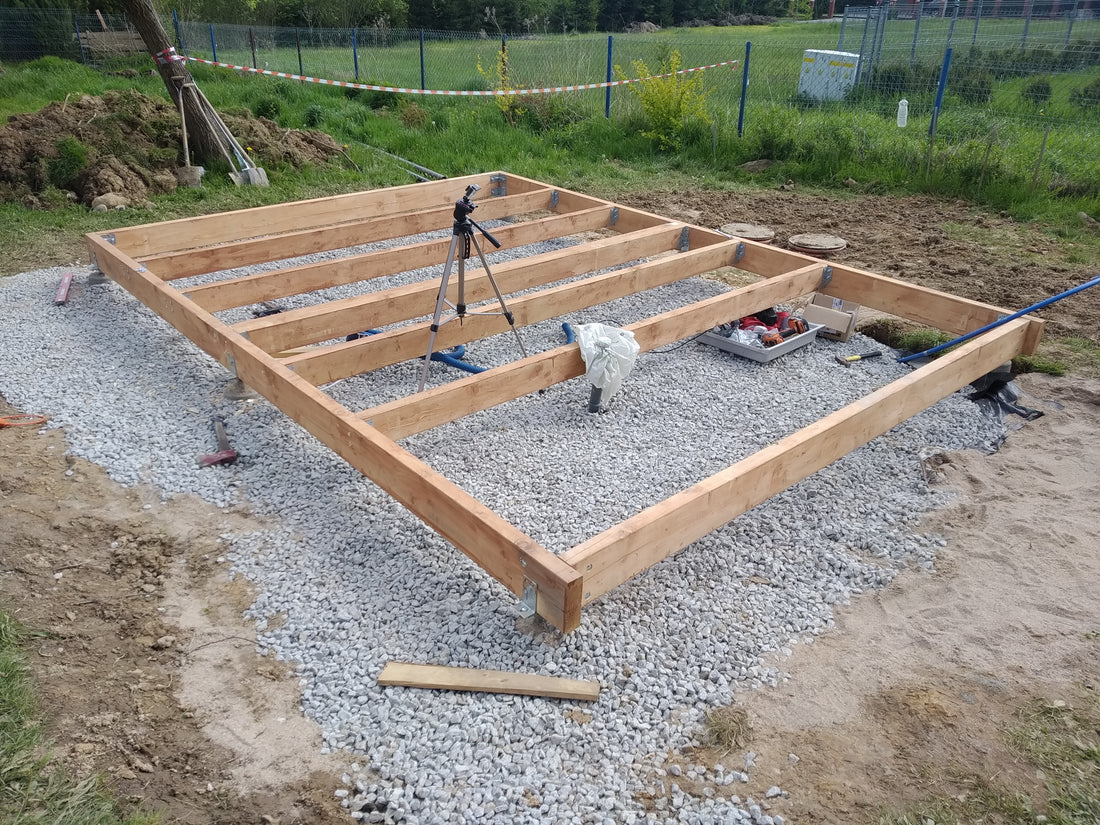
4. Connect the floor joists to each other

If the wood is warped, use clamps and level to straigten it out. Secure the position with the steel connectors.
5. Pour the concrete
Once your foundations are in place, it's time to pour the concrete. We recommend using high-quality, ready-mixed concrete for the best results. Be sure to pour the concrete evenly into each hole around the prefabricated foundation, and use a level to ensure that everything stays straight and level.

Use a steel rod to remove any air pockets from the concrete, directly after pouring it.
6. Wait for the concrete to set
After you've poured the concrete, it's important to wait at least 48 hours for it to set. This will ensure that your sauna foundation is strong, stable, and ready for the next steps of your build.

With these tips and tricks, you'll be well on your way to building the perfect outdoor sauna foundation. So grab your tools, fire up your passion for saunas, and get ready to create your own private oasis of warmth and relaxation. Happy building!
If you want to get accurate plans that include the foundation layout, check out our plan sets. Each one is carefully designed to make sure the build goes smoothly.


